How to prepare the MacBook Pro for Java development and more
(P) Codever is an open source bookmarks and snippets manager for developers & co. See our How To guides to help you get started. Public bookmarks repos on Github ⭐🙏
Well, I’ve recently gone to the “silver” side and acquired a MacBook Pro to use it for development when I am not at my PC. By development I mean here mainly Java + Javascript development. So I’ve written this post to remember what I had to install/configure to achieve this goal.
I need to mention that until now I’ve been a user of Windows (XP/7) and Linux (Ubuntu/Mint/Cent OS) operation systems.
At the time of this writing MacBook Pro runs on OS X Yosemite Version 10.10.5. The new version El Capitan was available, but I didn’t do the upgrade first because it had to many bad reviews…
Contents
JDK
So first things first- installe a Java Development Kit (JDK), which is a software development environment used for developing Java applications and applets. It includes the Java Runtime Environment (JRE), an interpreter/loader (java), a compiler (javac), an archiver (jar), a documentation generator (javadoc) and other tools needed in Java development.
Download the Mac OS X x64 .dmg files version
You can find out where the JDK is installed, by executing the /usr/libexec/java_home -v 1.7 , on the terminal command:
Adrians-MacBook-Pro:ama ama$ /usr/libexec/java_home -v 1.8
/Library/Java/JavaVirtualMachines/jdk1.8.0_65.jdk/Contents/Home
Adrians-MacBook-Pro:ama ama$ /usr/libexec/java_home -v 1.7
/Library/Java/JavaVirtualMachines/jdk1.7.0_79.jdk/Contents/Home
Adrians-MacBook-Pro:ama ama$
You will need to know this when setting up a project in IntelliJ for example.
Set JAVA_HOME
JAVA_HOME is just a convention, usually used by Tomcat, other Java EE app servers and build tools such as Maven to find where Java lives.
In Mac OSX 10.5 or later, Apple recommends to set the $JAVA_HOME variable to /usr/libexec/java_home, just export $JAVA_HOME in file ~/.bash_profile or ~/.profile
$ vim .bash_profile

export JAVA_HOME=$(/usr/libexec/java_home)

$ source .bash_profile

$ echo $JAVA_HOME
/Library/Java/JavaVirtualMachines/jdk1.8.0_65.jdk/Contents/Home
Maven
With the JAVA_HOME environment variable configure, go to the Apache Maven Downloads website, download the .tar.gz or .zip archive and unpack it in a folder of your choice – I put it under the /opt directory:
tar xzvf apache-maven-3.3.3-bin.tar.gz
It is also recommended to create a symbolic link to the Maven home, so that when let’s say you update your Maven version, you’ll only have to change the symbolic link target:
ln -s /opt/apache-maven-3.3.3 /opt/maven
Then set Maven in the environment variables
vim ~/.bash_profile
export M2_HOME=/path/to/maven
export M2=$M2_HOME/bin
export PATH=$M2:$PATH
Close the terminal and open a new one. When you try now to get the maven versioning you should get something like the following:
ama$ mvn -version
Apache Maven 3.3.3 (7994120775791599e205a5524ec3e0dfe41d4a06; 2015-04-22T13:57:37+02:00)
Maven home: /opt/maven
Java version: 1.8.0_65, vendor: Oracle Corporation
Java home: /Library/Java/JavaVirtualMachines/jdk1.8.0_65.jdk/Contents/Home/jre
Default locale: en_US, platform encoding: UTF-8
OS name: "mac os x", version: "10.10.5", arch: "x86_64", family: "mac"
An alternative is to use Homebrew and execute the following command:
brew install maven
GIT
Open a terminal window and type the following command for example:
$ git --version
At the next moment you will be asekd to install Xcode. This is the a complete developer toolset for building apps that run on Apple TV, Apple Watch, iPhone, iPad, and Mac. It includes the Xcode IDE, simulators, and all the required tools and frameworks to build apps for iOS, watchOS, tvOS, and OS X (it also contains GNU Compiler Collection-gcc).
You can do the above, but if you do not want everything from that package you can install Homebrew (“Homebrew installs the stuff you need that Apple didn’t.”) and run the following commands:
brew install gcc
brew install git
Either way once Git is installed the initial command git –version will bring the installed version:
$ git --version
git version 2.4.9 (Apple Git-60)
If you are working with Github, I recommend you also install the Github Desktop
IntelliJ
In the mean time IntelliJ has become my favorite IDE, mainly because you have almost the same feature support when doing front-end development. To install it, go to the download page and follow the installation instructions:
INSTALLATION INSTRUCTIONS
- Download the idea-15.dmg OS X Disk Image file.
- Mount it as another disk in your system.
- Copy IntelliJ IDEA to your Applications folder
Once done you need to get acquainted with key shortcuts for OS X – IntelliJ IDEA Mac OS X Keymap
Extras
Keyboard shortcuts
General
Please visit](https://support.apple.com/en-us/HT201236) for usual keyboard shortcuts (Cut, copy, paste, and other common shortcuts, document shortcuts etc.)
Finder
- Shift + cmd + C > go to Computer
- Shift + cmd + H > go to Home folder
- Shift + cmd + D > go to Desktop
A quick access with the mouse to the same folders is by dragging and dropping them on the sidebar under Favorites
As long as we are by sidebar subject, a good productivity gain can be achieved by using Smart Folders – these folders let you save a search to reuse in the future. Smart Folders are updated continuously, so they always find all the files on your computer that match the search criteria. Watch the following video to see how you can easily add them to the sidebar
NodeJS
Node.js® is a JavaScript runtime built on Chrome’s V8 JavaScript engine. Node.js uses an event-driven, non-blocking I/O model that makes it lightweight and efficient. Node.js’ package ecosystem, npm, is the largest ecosystem of open source libraries in the world. Recently is a must have tool if you need to do fancier stuff on your front-end part of your application.
Go to https://nodejs.org/ and download the latest version for OS X (x64). Double click on the node-v4.2.2.pkg file (latest stable version at the writing of the post) and follow the installation instructions steps.
When ready open a terminal window and check the version installed to see if it is working:
$ node --version
v4.2.2
MySQL
Go to Downloads page – https://dev.mysql.com/downloads/mysql/, download the Mac OS X 10.10 (x86, 64-bit), DMG Archive and follow the steps described in the installation guide.
Start, stop server
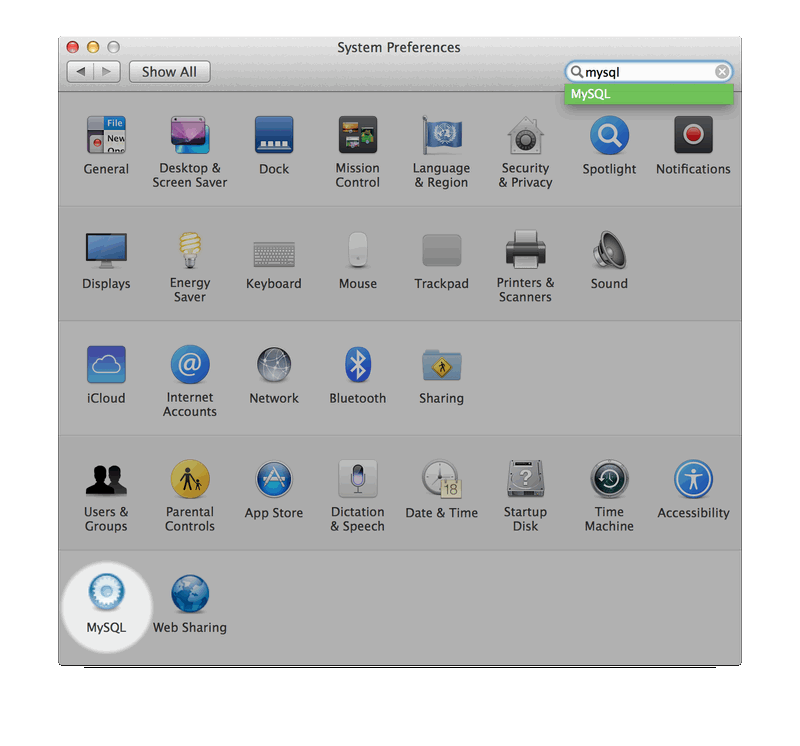
The MySQL Installation Package includes a MySQL preference pane that enables you to start, stop, and control automated startup during boot of your MySQL installation.
This preference pane is installed by default, and is listed under your system’s System Preferences window, which can be found under Applications.
Access MySQL from command line
Basically need to add MySQL to the PATH variable. Edit the /~.bash_profile with the following:
export MYSQL_HOME=/usr/local/bin/mysql
export PATH=$PATH:$MYSQL_HOME/bin
To test that it’s working start a new terminal and verify mysql version from command line:
adrians-macbook-pro:~ ama$ mysql --version
mysql  Ver 14.14 Distrib 5.7.9, for osx10.9 (x86_64) using  EditLine wrapper
Install MySQL Workbench
If you want to have also a GUI on top of it I recommend you install the MySQL Workbench that can be also found in the downloads section. Installation instruction is the same as the MySQL server installation.
Terminal window
Set background black
Open Terminal, then go to the Terminal menu -> Preferences, choose the Settings tab and set the Pro theme as the default.
Jump to beginning/end of a line
To jump at
- beginning of a line – Ctrl+A
- end of a line – Ctrl+E
- jump between words – Alt+</>
Open terminal in here
Go to:
System Preferences > Keyboard > Shortcuts > Services
Enable New Terminal at Folder. There’s also New Terminal Tab at Folder, which will create a tab in the frontmost Terminal window (if any, else it will create a new window). These Services work in all applications, not just Finder, and they operate on folders as well as absolute pathnames selected in text.
You can even assign command keys to them.
Services appear in the Services submenu of each application menu, and within the contextual menu (Control-Click or Right-Click on a folder or pathname).
The New Terminal at Folder service will become active when you select a folder in Finder. You cannot simply have the folder open and run the service “in place”. Go back to the parent folder, select the relevant folder, then activate the service via the Services menu or context menu.
In addition, Lion Terminal will open a new terminal window if you drag a folder (or pathname) onto the Terminal application icon, and you can also drag to the tab bar of an existing window to create a new tab.
Finally, if you drag a folder or pathname onto a tab (in the tab bar) and the foreground process is the shell, it will automatically execute a “cd” command. (Dragging into the terminal view within the tab merely inserts the pathname on its own, as in older versions of Terminal.)
You can also do this from the command line or a shell script:
open -a Terminal /path/to/folder
This is the command-line equivalent of dragging a folder/pathname onto the Terminal application icon.
Use aliases
To ease your life for long and usual commands use aliases. For example to connect remote instead of typing ssh ama@x.y.z.q and having to remember ip address or server name, you could just type rmcon (or whatever it’s easy for you to remember). To do that append to the .bash_profile in your home directory the alias command and then source the file:
vim ~/.bash_profile
export MYSQL_HOME=/usr/local/bin/mysql
export PATH=$M2:$MYSQL_HOME/bin

alias rmcon='ssh ama@x.y.z.q'
source ~/.bash_profile
I can’t stress enough, how much comfortable your life can become, if you are using aliases the right way - A developer’s guide to using aliases
Commands
Find out who is listening on port (e.g. 8080)
lsof -i | grep 8080
iTerm2
A very nice alternative to the “classic” terminal is iTerm, now in version 2:
“iTerm2 is a replacement for Terminal and the successor to iTerm. It works on Macs with OS 10.5 (Leopard) or newer. iTerm2 brings the terminal into the modern age with features you never knew you always wanted“
Look under Preferences > Keys for shortcuts to easily navigate/move the tabs…
Generate ssh keys
Open a terminal window and execute the following command:
ssh-keygen -t rsa
Man pages:
ssh-keygen generates, manages and converts authentication keys for ssh(1). ssh-keygen can create RSA keys for use by SSH protocol version 1 and DSA, ECDSA, ED25519 or RSA keys for use by SSH protocol version 2. The type of key to be generated is specified with the -t option. If invoked without any arguments, ssh-keygen will generate an RSA key for use in SSH protocol 2 connec-tions.
You will be asked then where to store the key (default under /Users/YOUR_USERNAME/.ssh/id_rsa)
When asked for a passphrase you can enter a passphrase to add it to the key. If you choose to add a passphrase every time you want to use your key with ssh, you’ll have to enter this passphrase. It is a little bit more inconvenient, but more secure.
Once that is done, you should get a message like the following:
Your identification has been saved in /Users/ama/.ssh/id_rsa.
Your public key has been saved in /Users/ama/.ssh/id_rsa.pub
You can now use the generated id_rsa.pub key and upload it to the systems you want to connect to over ssh.
Install Programs from Unidentified Developers {.title}
By default, Mac OS only allows users to install applications from ‘verified sources.’ To change that open the System Preferences > Security & Privacy > General and select “Allow applications downloaded from: Anywhere“. Follow this link, to see a more detailed description with pictures.
Often used UNIX keys on the German/Swiss keyboard
I bought the Mac Book to use it as developer machine on the go and one of my initial surprises was the missing of some keys a developer/terminal user uses pretty often like []|{}~
Find below a map for these keys:
So here it is, my personal keyboard map reminder for the Mac OS X:
| | | pipe symbol | alt7 |
| \\ | backslash | alt shift 7 = alt/ |
| [ | left (opening) square bracket | alt 5 |
| ] | right (closing) square bracket | alt 6 |
| { | left (opening) curly bracket | alt 8 |
| } | right (closing) curly bracket | alt 9 |
| ~ | Tilde | alt n followed by the space key |
| @ | “At” symbol | alt g (lowercase G) alt L German Keyboard |
How to test everything is working
A smoke test to verify if everything installed is functioning properly “together” is to generate an application with JHipster and push it to a git repository.
JHipster is a Yeoman generator, used to create a Spring Boot + AngularJS project.
For any suggestions please leave a comment. Thank you.
References
- Linux/Mac OS X Terminal: make the background black, not white
- How to Set $JAVA_HOME environment variable on Mac OS X
- Maven installation guide
- Mac OS X: often used UNIX keys on the German keyboard
- Is there any way in the OS X Terminal to move the cursor word by word?
- Open terminal here in Mac OS finder
- SSH Keys with a Passphrase
- Make an Alias in Bash Shell in OS X Terminal